
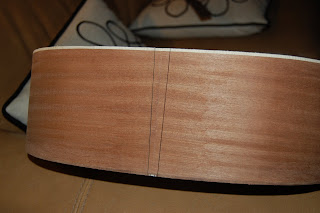
The wedge taped in place so I can mark its
outline
on the body with pencil.
outline
on the body with pencil.
They would have been mitered at the top and bottom of the wedge to meet the purfling that went around the rest of the body. But in the end, (pun not intended but I am glad it happened) I decided the purfling lines did not go with the rest of the binding and purfling I am using, so I scrapped that idea and just installed the wedge au natural.
After I traced the outline, I then scored the
lines with
a razor knife as deep as the wedge will go.
Not using the additional lines also went with my theme of, "Holy crap, I don't really know what I am doing! Why am I going to try to make this more difficult for myself?" Here is a picture of a beautifully purfled (is that even a word?) end wedge 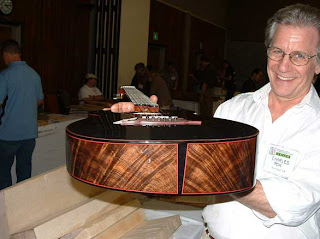 with the purfling going around the wedge: If you click on the image it will get bigger and you can see how nice it looks. I chose this picture because it is an excellent example of what I wanted to do and didn't. I also used it because the red purfling really stands out. Yes...the red line is the purfling and it is what I have been talking about. I "borrowed" this picture from a company called Luthier's Mercantile International, Inc. They sell everything you would need to build or repair guitars. Check them out. They have some cool stuff. I bought the back strip that I used on this guitar from them. It was like $5 bucks. You can see it in one or two of the pics on this page. So that's where I am now. I am very tempted at this point in the evening to do more work, but I am tired and I don't want to mess anything up.
 with the purfling going around the wedge: If you click on the image it will get bigger and you can see how nice it looks. I chose this picture because it is an excellent example of what I wanted to do and didn't. I also used it because the red purfling really stands out. Yes...the red line is the purfling and it is what I have been talking about. I "borrowed" this picture from a company called Luthier's Mercantile International, Inc. They sell everything you would need to build or repair guitars. Check them out. They have some cool stuff. I bought the back strip that I used on this guitar from them. It was like $5 bucks. You can see it in one or two of the pics on this page. So that's where I am now. I am very tempted at this point in the evening to do more work, but I am tired and I don't want to mess anything up.
 After the lines are scored, I used a
chisel to remove the
wood between the lines.
Here you can see the back
strip I mentioned.
I am testing out a new format for the blog. I put the pictures in the center with captions instead of at the side. Its easier for me to caption the pics rather than try to make what I am writing fit to the correct picture. Now, I can just space out the pics and as you read along, you can say, "Ooh! Look at what Tony is doing here! What the heck is he doing here? Or just skip the pic and come back to it when you finish reading the fascinating crap I have written. Let me know if you like it this way. And by you, I mean my three relatives and one friend who check it.

The wedge is in. I cleaned up the glue that
squeezed out and she looks
good. Now I have to scrape
it flush with the rest of the
body since I left it a little
proud of the sides.
(proud is wood worker
speak for "higher than" and it is used
because it saves so much time
over saying
"higher than" that an experienced
wood worker (or Amish guy)
can make an extra foot stool
each day.)
I still have to scrape the wedge level with the sides and trim off the overhang, but those are pretty quick tasks. I will have those things done before I move on to the next step which in the KMG manual is to tweak the fit of the neck to the body to make sure it fits correctly and that all the work I have done up till now has not been for nothing. Of course, if I really did screw everything up, at least I will have the neck bolted on so I can smash the guitar like John Belushi in Animal House. I don't think that is going to happen though.


No comments:
Post a Comment